It seems that moving is the order of the day here at Gracies Bakes.
We are moving house, and town and now we have moved location.
All your favourite recipes and sweets can now be found here.
Come and visit soon.
xx
Tuesday, June 16, 2009
Sunday, June 7, 2009
Gadget of the Month
I am a terrible shopper.
Let me clarify that...
I forget to write a list, dash round the store picking up things that I think I need and then I get distracted by something shiny and new, buy it and get home and realise that I have forgotten something vital, like the lemons for a lemon cake, or the chocolate for a chocolate mousse.
I have been trying to curb my spending recently as I am "saving" money for the house and the nice things that are necessities. Like carpets and floors!
 MIU Silicone Bowl Scraper, Blue">
I have been trying to curb my spending recently as I am "saving" money for the house and the nice things that are necessities. Like carpets and floors!
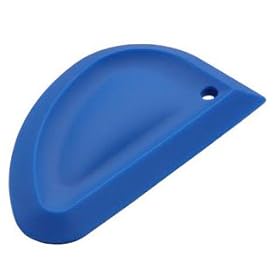
MIU Silicone Bowl Scraper, Blue">THIS is the latest shiny and new wonder that I have found. A silicone scraper.
While I survived just fine when I didn't have one, I now wonder what I did without it. No more will you go at the bottom of a mixing bowl with a small spatula trying to get all the little last bits out of it and into the cake tin. Two, possibly three scrapes, will have all the batter in the tin with no waste. Lets face it in these recessionary times, none of us like to see anything go to waste.
However, if you like to lick the bowl, you could always leave a little in the bottom of the bowl. Just to taste of course!
Costing in the region of €8 they are quite cheap and very handy to have. And lets face it, they won't break the bank!
Mine is a lovely baby pink colour, and matches the lovely large mixing bowls and knives that I have.
Enjoy!
Orls
Thursday, June 4, 2009
I *HEART* Sunshine
It makes things seem very happy and bright.
 DDWGX1 - Fisher & Paykel Freestanding Cookers Exterior view">
Sunshine puts everyone in good form and it has certainly made the trauma of moving house a little more bearable! Rests from packing and moving are taken in the garden with a nice cool glass of lemonade and some fresh chilled strawberries.
However, the ongoing moving means that my lovely baking things are all packed away as I have moved back in with my parents until my house is actually finished! This means that baking is taking a bit of a back seat and I am concentrating on getting house fitted out and buying things like carpets, furniture, and ovens!
I am very excited about the kitchen that is going in soon, (next week with some luck!)
In this kitchen will sit my new pride and joy, a Fisher and Paykel double range oven. At 4ft wide,it is like a mothership, and its size has meant that the general layout of the kitchen has needed some tweaking. Some of the units are smaller than the show house, but I was in with the designer last week, and I have signed off on the final plans.
Here is a little pic of the mothership.
DDWGX1 - Fisher & Paykel Freestanding Cookers Exterior view">
Check out the specs here.
A quick note on the price of the oven.... If you are near to the border, or even a few hours from it, the drive is really worth it given that the savings are immense versus the Euro Price. Suffice to say that Mr. Cowen and his chums are ruining Irish retailers with their increase in VAT rates. Most of the retailers that I have spoken to in Northern Ireland will deliver for free or for a minimal cost as they are delighted with all the business they are getting.
And here's the stinger...
The appliances come through the port in Dublin! Go Figure.
On that note, I am off to spend some hard earned cash on an oven that I could probably live in if I wanted!
More posts to follow shortly. We at Gracie's have some exciting news coming soon. Can't say much but will fill you all in as soon as we can.
Enjoy the weather. It probably won't last!
Orls xxx
Sunday, May 24, 2009
Sourdough Bread

Sourdough is one of those breads that people tend to stay away from as it appears to be difficult. In fairness, it is not all that difficult, but is very very time consuming. As in it has to be started 4 days or so before you want to bake it. However, it is well worth the effort and just think how impressed everyone will be that you made your own!
There are three parts to this bread. The starter, the sponge and the dough.
For the starter, you make this 4 days you want to make it.
You will need;
150g rye or strong white flour,
a pinch of yeast from easy-blend yeast sachet,
half a teaspoon of milk, approx 200ml water
Combine the flour, the yeast and milk and as much water to make a mixture like a thick pancake batter, and leave, loosely covered for 3 days.
For the Sponge you will need:
180ml of the starter,
180ml warm water, 100g rye or strong white flour
Mix all the ingredients together and leave tightly covered for 12-18 hours. The longer time is better but if you only have the 12 hours, that is fine.
For the dough you will need;
375g wholemeal bread flour (if for the rye sourdough) or 500g strong white flour,
the rest of the easy blend yeast sachet or 15 g of fresh yeast,
all the sponge from above, 1 scant tablespoon salt,
1 tablespoon caraway seeds (for the rye only)
250-300ml warm water, Vegetable oil for greasing
Put the flour and yeast in a large bowl, and then stir in the other ingredients until you have a messy dough. Knead either by hand or by machine adding more flour as needed to form a smooth, dense dough.
Form into a ball and pit in an oiled bowl. Cover with cling film and leave to double in size, either overnight in a cold place or in the fridge, or in a warm place for an hour or so.
When the dough has gotten big, punch it down have knead for 1-2 mins and form into a round loaf, and sit it covered with a tea towel on a baking sheet. Preheat the oven to 200C and let the oven warm up while the loaf is left for about 30 mins until puffy.
Uncover the bread, and score the top of the loaf. The knife should be very sharp so that it scores through the dough easily. Otherwise, the bread will deflate.
Transfer to the oven to bake for about 45 mins or until the bottom sounds hollow when tapped.
Allow to cool and enjoy with soups, cheese, meats. Or on it's own with some nicely flavoured olive oil.
 Orls xxx
Sunday, May 17, 2009
Proving a point!
Bread can be time consuming. Kneading the dough can take a long time, especially if you use strong flour.
Then you have to leave the bread to prove.
Basically, letting your bread prove, means that you are letting the yeast time to work and raise the dough. Generally, to do this you cover the dough with a damp tea towel and put it in a draught free, warm place for 30-40 mins until it has about doubled in size.
The scientific explanation is here.
I don't understand it fully, but I do know that every single time that I make bread, I get a little kick when I draw back the tea towel to discover that the dough is all puffy and pretty.
yum yum!
Orls xxx
Olive & Rosemary Focaccia Bread
I love family occasions where you get to sit around, eat good food, drink a little wine and chat and catch up with the relatives that you see once or twice a year.
This weekend, I spent the night in Galway with family in honour of my cousin's confirmation. There was a gathering afterwards with about 25 people so I offered to make some breads.
I decided that an olive and rosemary focaccia bread would be just the ticket.
I love focaccia. Its olivey moistness and aftertaste. Now, it may come as a surprise that I love Olive oil, but I don't particularly like olives. I have tried to eat them, but I just find the really really intense. A little too intense.
But I love focaccia bread with plates of antipasti with hummous, some meats, some olive oil and balsamic to dip it in. And some cheese.
To make this focaccia bread you will need.
310ml warm water, 7g/1 sachet dried yeast
2tsp caster sugar, 3.5 tbsp olive oil,
450g plain flour, 2tsp sea salt flakes
1.5 tbs fresh rosemary leaves & 20 kalamata olives (pitted)
Combine the water, yeast and sugar and 2 tbs of the oil in a small bowl. Set aside in a warm draught free place for 5 mins or until frothy.
Place the flour and half of the salt in a bowl. Make a well in the centre and pour in the yeast mixture. Use a wooden spoon and stir until combined, then use your hands to bring the dough together in the bowl.
Turn onto a lightly floured surface and knead for about 10 mins until smooth and elastic. Brush a bowl with oil to grease. Place the dough in the bowl and cover in cling wrap and set in a warm place for 45 mins until doubled in size.
Preheat your oven to 200C. Brush a swiss roll pan with 2 tsp of oil. Punch down the centre of the dough with your fist. Turn onto a lightly floured surface and knead for 2 mins until the dough is its original size. Press into the prepared tin and allow to prove for 20 mins( again until doubled in height)
Use your finger to poke dimples in the dough and place the olives in. Brush with the remaining oil and sprinkle with the rosemary. I actually stuck the rosemary into the bread.
 Bake in the oven for about 25-30 mins, until golden.
 Remove from the oven and either serve warm, or at room temperature.


We enjoyed it with a variety of amazing dishes, beef in Guinness, a tagine that was sweet and warm with a lingering taste of moreish-ness, a couscous dish, chickpea and mango salad and a really really delicious dhal.
The best thing about the day was definitely seeing some family that I hadn't seen since before Christmas, and seeing those that I hadn't seen in a lot more time!
Enjoy this bread with family or friends, some other nice food, some nice wine and most importantly, laughter!
Orls xxx
Sunday, May 10, 2009
Double Chocolate Mousse with Chilli and Pistachio
I realise that I have been very lazy of late with my blog, and the main reason for this is because I have just purchased my first ever house.
My time has been spent doing house things like signing contracts, looking at floors and carpets and also, excitingly, designing my new kitchen! All going well, I will have moved in by the middle of July!
While very scary, it is very very exciting that I am going to have a home that I can call my own (well in 35 years I will!!!)
Because of the lack of time, I have also been a little lax in seeing friends and catching up for chats, so I asked my lovely friend Mrs. D to come over for dinner last night with Mr. C and I.
Nice food, good company, nice chats and a game of monopoly all made for a lovely evening.
I decided that such a night, deserved a rather decadent dessert, and while leafing through a (new) cookbook called Fantastico! I came across a recipe for a Double Chocolate Mousse, with Pistachio and Chilli.
It is a really simple recipe and can be made hours in advance of your party meaning that you can spend time with your friends, and not in the kitchen. Sounds like my kind of dessert.
The combination of the chocolate and pistachios means a scattering of nuts through the mousse. The chilli adds a little kick which leaves a nice after effect of heat. And don't worry, the alcohol is very subtle, and certainly doesn't over power the chocolate.
You will need:
150g good quality dark chocolate, broken into pieces,
100g good quality white chocolate, broken into pieces,
3 medium eggs, separated, 2 tablespoons caster sugar,
8 tablespoons of crushed pistachios (reserve a few for decorating)
1 small, medium hot chilli, deseeded and thinly sliced.
2 tablespoons Grand Marnier
250ml double cream, softly whipped.
Melt all the chocolate together in a heatproof bowl over a pan of simmering water. Set aside to cool.
Beat together the egg yolks and the caster sugar until pale and creamy.
In a separate clean bowl, whisk the egg whites until stiff.
Use a metal spoon to fold the chocolate into the egg yolks. Add the pistachios, the chilli and the Grand Marnier ( I actually used Hennessy Cognac as I didn't have any Grand Marnier!) Mix well and fold in the cream gently. Lastly, very gently, fold in the egg whites, and combine all the ingredients.
Pour the mousse into 4x250ml glasses, or 6 smaller ones, or even 8!*
Cover with clingfilm and chill for at least 3 hours. Just before serving, remove the cling and decorate with the pistachios and some slivers of chilli!

* I used these cute little espresso sets to serve the chocolate mousse. With a saucer and an espresso spoon, they really add to the oomph of the dessert. As I mentioned the mousse is quite rich, so this amount was perfect.
I had plenty left over as there were just the three of us for dinner, so I may just have to have some again for dessert this evening. It would be terrible to have it go to waste, wouldn't it???
Enjoy.
Orls xxx
Subscribe to:
Comments (Atom)